Best Spin Art Drills: Variable Speed Control
By Mei Tanaka • 2nd May
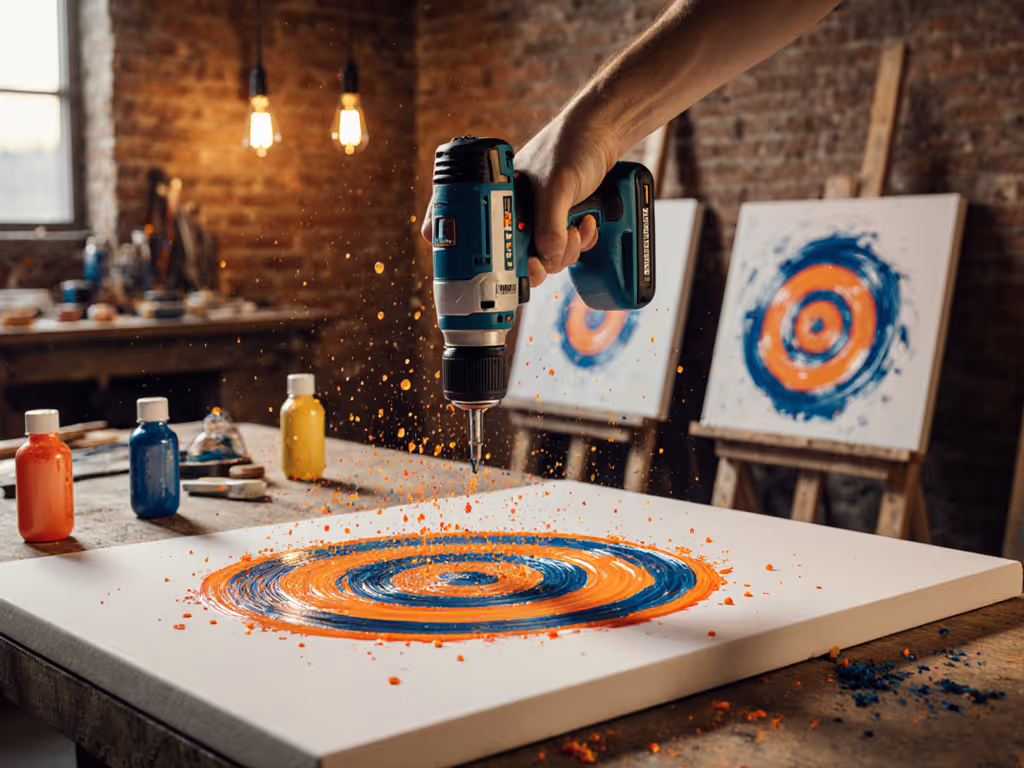
Spin art (those hypnotic, kaleidoscopic patterns created by rotating wet paint on a canvas) has evolved from a novelty craft into a serious creative pursuit for home artists, muralists, and makers. What separates a mediocre spin-and-fling session from professional-grade results often comes down to one tool: an impact drill cordless or compact rotary tool that lets you dial in precisely the RPM you need. A creative spinning drill isn't just about maximum speed; it's about control, consistency, and the ability to modulate rotation smoothly across the range your art demands.
As someone who's spent years optimizing hand tools for predictable, fatigue-free performance, I've come to appreciate that choosing the right drill for spin art mirrors the broader lesson I learned years ago while prototyping handles: balance and control matter infinitely more than headline specs. After taping weighted coins along a prototype drill to find the optimal center of mass (watching a novice's screws stop wandering once the balance improved), I realized that peak torque is nearly meaningless if the tool fights you under load. The same principle applies to spin art: variable speed drill for artists should prioritize smooth acceleration, consistent power delivery, and ergonomic balance so your art, not the tool, becomes the focus.
Why Variable Speed Control Defines Spin Art Performance
Hands vary; tools should adapt. In spin art, RPM directly shapes pattern density, paint distribution, and visual complexity. Low speeds (400-800 RPM) produce bold, defined spirals with distinct color separation. Mid-range speeds (1200-1800 RPM) blend colors into marbled gradients. High speeds (2000+ RPM) create dense, intricate webs that can either mesmerize or muddy, depending on paint viscosity and canvas size.
Variable speed isn't simply a luxury, it's the difference between wasting paint and producing gallery-worthy work. A rotary art projects setup demands:
- Smooth speed transitions with no dead zones or abrupt jumps that break artistic flow
- Predictable power delivery under load (thick paint, multiple layers, canvas wobble)
- Low vibration to keep your wrist stable and patterns clean
- Trigger modulation granular enough that you can hold a precise RPM without fatigue
A drill that lurches from 0 to 1500 RPM or drops speed when paint loading increases will sabotage even careful technique. You'll find yourself fighting the tool rather than guiding the art.
Key Specifications and What They Mean for Spin Art
Motor and Speed Range
A quality craft making power tools setup starts with a brushless motor in the 12-18V range. Brushless motors offer smoother, more consistent power curves (essential when you're layering colors and need predictable speed under variable load). RPM range matters more than peak RPM; look for drills offering 0-2000+ RPM with electronic speed control rather than fixed steps. For a deeper breakdown of torque, RPM, and chuck size specs, read our torque vs RPM guide.
Trigger Sensitivity and Curve
The trigger is where control lives or dies. Optimal spin art drill recommendations specify triggers with:
- Progressive, linear response: 10% trigger press yields ~200 RPM, 50% press yields ~1000 RPM, full press yields ~2000 RPM. Avoid exponential curves that dump power suddenly mid-range.
- Minimal trigger travel (typically 3-5 mm full range) so micro-adjustments don't require finger gymnastics.
- Consistent break feel so you can release to exact speeds without overshooting.
Balanced weight and clean triggers beat headline torque every day.
I quantify trigger performance by recording the pressure curve and response lag with a test rig, then timing how quickly I can stabilize a 12-inch canvas at a target RPM. Drills with linear triggers consistently achieve lock-in within 2-3 seconds; poor triggers take 8+ seconds as I hunt for the right speed.
Chuck Runout and Bearing Play
If your canvas support (typically a foam or magnetic chuck) slips or wobbles, vibration spikes and patterns fracture. Inspect:
- Runout tolerance: Quality tools hold <0.5 mm lateral play at full speed; cheap chucks exceed 2 mm; learn how to measure chuck runout to verify your setup.
- Bearing preload: A tight, smooth rotation with no clicks or grinding as you apply lateral pressure.
- Lock mechanism: Keyless chucks should grip instantly and release with one click; sluggish chucks indicate worn bearings.
Vibration and Pitch
Vibration amplitude and character reveal motor balance and gear mesh quality. For causes, diagnostics, and fixes, see our drill vibration control guide. Listen for:
- High-pitched whine (3000-5000 Hz): Clean gear mesh, well-balanced motor.
- Rumble or low-frequency buzz (500-1200 Hz): Worn bearings, unbalanced rotor, or loose internals, all destructive to fine art patterns.
- Tactile vibration: Should feel smooth and diffuse; sharp, rhythmic pulses indicate bearing or gear issues.
I time how long forearm burn sets in during sustained operation. A well-designed drill lets me hold speed steady for 30+ minutes; poor balance induces fatigue within 10 minutes, causing speed drift and pattern degradation.
Weight, Balance Point, and Wrist Fatigue
Spin art isn't a quick task. You're often holding the drill at 45-90 degrees to a vertical canvas, applying steady downward pressure while modulating speed. Weight and balance directly predict fatigue and pattern quality.
Total Weight
Aim for compact drills under 3.5 lbs (1.6 kg) with battery. Anything heavier becomes exhausting during overhead work or multi-hour sessions. Lightweight designs also allow finer micro-movements, critical when you're layering colors.
Balance Point
The balance point (the spot where a horizontal drill neither tips forward nor backward) should sit between the chuck and the rear handle grip, ideally around 2-3 inches forward of the trigger guard. This puts the center of mass near your hand, reducing lever-arm fatigue.
I test this by placing a drill on a pencil edge perpendicular to the barrel and noting where it equilibrates. Tools balanced too far forward (near the chuck) demand constant wrist extension to stabilize, a classic fatigue culprit. Tools balanced too far back shift load to your shoulder and upper arm. Centered balance lets your hand and wrist work as designed, enabling longer, steadier sessions.
Grip Diameter and Surface
Grip fit varies by hand size. I measure circumference at the primary grip zone (where your fingers wrap during trigger modulation) and cross-reference against hand breadth (measured at the widest knuckle point).
- Small hands (< 7 inch breadth): 1.25-1.5 inch grip diameter.
- Medium hands (7-7.8 inch breadth): 1.5-1.75 inch diameter.
- Large hands (> 7.8 inch breadth): 1.75-2.0 inch diameter.
Surface texture matters too. Slightly textured, soft-touch handles (rubber or TPE) reduce slippage when hands are wet from paint splatter and provide better vibration damping than hard plastic.
Variable Speed in Practice: Common Scenarios
Building Up Base Colors (800-1200 RPM)
Initial colors should be applied at moderate speeds to ensure even distribution without violent splatter. A well-tuned trigger lets you dial in 1000 RPM precisely and hold it while adjusting canvas angle. Speed droop (slowing under load) at this stage causes uneven color saturation and pale edges.
Layering and Blending (1200-1800 RPM)
Second and third colors introduce paint viscosity challenges, thicker layers resist rotation and demand responsive speed control. If your drill's electronics can't compensate (constant-speed brushless motors or load-sensing governors), you'll experience 100-300 RPM drops, disrupting blended gradients.
Fine Detail Work (400-600 RPM)
Slow speeds are notoriously hard to control with cheap drills. Many lack smooth low-end torque, causing stuttering or surges. A quality variable-speed motor should deliver consistent torque and smooth acceleration even at 400 RPM (critical for precision spin art with defined geometric patterns).
Comparing Drill Types for Spin Art
Cordless Drills (18-20V)
The standard choice for impact drill cordless spin art setups. Advantages:
- Broad RPM range (0-2000+ RPM typical).
- Sufficient torque for thick paint and heavier canvas frames.
- Battery platforms often support other tools (sanders, saws, future projects).
- Variable-speed triggers on mid-tier and above models.
Disadvantages:
- Larger, heavier than compact rotary tools (can cause wrist fatigue over long sessions).
- Overkill power for art; you're using 20% of available torque.
Compact Impact Drivers
Slightly lighter and more balanced than full drills, some compact impact drill cordless models excel at art:
- Lower weight (2.8-3.2 lbs) improves endurance.
- Often better balance points due to compact battery design.
- Reduced vibration due to lower overall mass.
Disadvantage: Impact drivers deliver power in discrete pulses (impacts), which is unsuitable for smooth, blended spin art patterns.
Rotary Tools and Die Grinders
Dedicated rotary art craft making power tools (e.g., 12V flex-shaft systems or die grinders) offer exceptional control:
- Ultra-smooth, variable-speed motors optimized for precision.
- Exceptional low-end torque and constant-speed regulation.
- Lighter and more balanced than corded alternatives.
Disadvantage: Limited to rotary-only work; no drill, driver, or hammer function for broader DIY projects.
Battery Considerations for Extended Spin Art Sessions
Spin art drill recommendations always hinge on runtime. A 2.0Ah battery at continuous mid-range draw (1200-1500 RPM under moderate paint load) typically yields 45-60 minutes of operation before noticeable voltage sag and speed droop commence. For serious spin art sessions:
- Use two batteries on rotation, charging one while the other operates.
- Opt for higher Ah counts (4.0-5.0Ah) if purchasing new; the weight increase is modest and runtime extension substantial.
- Monitor battery temperature; thermal throttling kicks in around 50°C (122°F), reducing available power and smooth speed control.
- Store batteries in cool conditions (15-25°C / 59-77°F) between sessions to preserve voltage stability and cycle life.
Runtime-per-Wh efficiency varies by platform and motor design. Quality brushless systems deliver 45-55 minutes per 2.0Ah at mid-range draw; brushed or poorly regulated systems drop to 30-40 minutes. Calculate your session duration and choose battery capacity accordingly; undersizing forces frequent swaps and interrupts creative flow. To maximize runtime and longevity with proper charging and storage, follow our drill battery life guide.
Setup and Safety Tips
Canvas and Fixture Design
Spin art requires a stable, balanced canvas frame. Runout and wobble in your fixture will sabotage even a perfect drill:
- Use foam backing or ball-bearing mounts to isolate the canvas from direct chuck pressure.
- Mount the canvas horizontally or at a slight angle for optimal paint distribution.
- Check concentricity; canvas should spin without visible wobble at any RPM.
Hand Positioning and Fatigue Management
Grip the drill firmly but not rigidly, tension kills precision. Position your hand so the drill sits in a neutral wrist posture (not bent backward, forward, or twisted):
- Elbow at ~90 degrees.
- Wrist straight, aligned with forearm.
- Thumb opposite fingers for stability without white-knuckle strain.
Take breaks every 20-30 minutes to prevent cumulative fatigue. Fatigue degrades speed stability and pattern consistency within 45 minutes of continuous work.
Speed Ramp-Up and Shut-Down
Always ramp RPM smoothly from zero, sudden acceleration throws paint and invites spillage. Similarly, ramp down gently before releasing the trigger; abrupt stops can cause splash-back or uneven color settling.
Protective Equipment
Wear safety glasses or a face shield. Spin art projects fling paint, dried specks travel up to 15 feet. Apron or dedicated clothing recommended; acrylic and latex paints are hard to wash out after drying.
Selection Framework: Matching Drill Choice to Skill and Scale
For Casual Makers (Weekend Projects)
Look for a variable speed drill for artists in the 12-18V range, brushless, with smooth trigger response and sub-3.5 lb weight. You don't need premium specs, mid-tier features (0-2000 RPM, linear trigger, decent chuck) suffice and cost $150-250 for a compact drill without battery.
For Serious Hobbyists (Multi-Hour Sessions, Selling Work)
Invest in a balanced, lightweight 18-20V brushless drill optimized for ergonomics and trigger linearity. Target balance points 2-3 inches forward of the trigger guard and creative spinning drill designs with soft-touch grips and progressive triggers. Budget $250-400 for tool-only; add two 4.0-5.0Ah batteries ($100-150 each) for continuous operation.
For Commercial/Gallery Work (Daily Use, Client Orders)
Consider purpose-built rotary art platforms or high-end compact impact drills rated for sustained duty cycles. Prioritize thermal management, warranty coverage, and tool reliability. Budget $400-600 for the tool and comprehensive battery setup. At this level, battery platform breadth matters, choose ecosystems with proven long-term support (10+ year availability) and extensive accessory ecosystems for future tool expansion.
The Path Forward: Making Your Decision
Choosing a spin art drill recommendations setup needn't be paralysis-inducing. Frame your decision around three anchors:
- Ergonomic fit: Handle it in person if possible. A balanced, comfortable drill reduces fatigue, improves control, and yields consistently better art. Don't buy based on specs alone; feel matters.
- Variable speed smoothness: Demand a linear trigger curve and smooth acceleration. Spend 30 seconds at idle and mid-range speeds; listen for clean motor tone and feel for jitter-free operation.
- Battery ecosystem longevity: Choose a platform with a 5-10 year roadmap. Spinner drills are a complement to broader DIY and creative work; picking an ecosystem with proven backward compatibility and broad tool availability protects your investment and minimizes battery/charger clutter.
Test-drive models if your retailer permits. Set up a dummy canvas (cardboard + foam) and apply paint. Observe how trigger modulation feels, how vibration affects your wrist, and how well speed holds under mid-range load. You'll quickly sense which tools align with your working style.
Your next step: Visit a local tool retailer or maker space offering hands-on demos. Spend 10 minutes with each candidate drill, evaluate trigger smoothness and balance point, then identify the top two options. Read user reviews focused on long-term reliability and speed stability (not just first impressions). Finally, confirm battery compatibility with your existing tools or planned future purchases (hammer drill, impact driver, circular saw, etc.). Once aligned, commit to that ecosystem and invest in quality batteries and a fast charger. The right setup pays dividends in pattern quality, wrist health, and creative consistency for years to come.
Related Articles